With the limited space in an RV, any item that can do double duty is a good thing. Well, here's a Very Good Thing: an attractive pillow by day and a cozy comforter by night. Best of all, it's a cinch to make—you can turn one of these out in less than an hour!
I'm not going to give you detailed, step-by-step quilting instructions here; I assume you know the basic routine. in fact, you don't even have to do any quilting—you can just as easily make this project from an ordinary blanket, or using pre-quilted material that's available in most fabric stores.
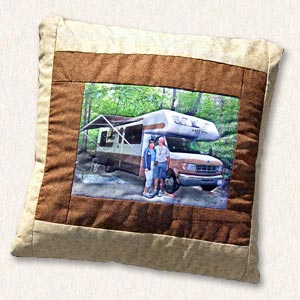
The 18" x 18" square that forms the front of the pillowcase can be plain, or you can embellish it in may ways, such as making a mini-quilt. Use your imagination and get creative!
You're probably wondering how I got that picture of my friends and their RV on the pillow shown here. I'll get to that, I promise! But first let's talk about how to make the basic pillow quilt. (Some folks call 'em "quillows.")
Let's say you're going to make the simplest version, using just a blanket or pre-quilted material. in that case, three yards of material will be enough for two pillow quilts, with a little left over. You'll need to finish the edges of both pieces as you normally would (for example, with quilt binding tape) so that you wind up with the finished dimensions shown here: 42" x 72" for the main piece and 18" x 18" for the pillowcase front.
Now for the forbiddingly complex assembly directions:
Place the 18" x 18" square on the bottom center of the 42" x 72" piece. Make sure the "pretty" side of the 18" x 18" piece faces the large piece—right sides together. Stitch the sides and bottom, leaving the top open to form a pocket, as shown here. That's it—you're done!
Here's how to fold the quilt into its built-in pillowcase. It may take you a couple of tries at first, but once you get the hang of it, it's really easy. First you fold the two long sides back... then fold down 18" from the top (three times)... and finally turn the pillowcase "pocket" inside out to reveal the decorative side. Like so:
See? Fold back, then fold down, then turn—no big deal.
By the way, if you want make other sizes, you can use this simple formula: the main piece needs to be four times as high as the pillow, and about two and a half times as wide. For example, a 12" x 12" pillow would unfold into a 30" x 48" quilt, suitable for a small child. This diagram shows how it works.
Once you realize how quick and easy these pillow quilts are to make, you'll be turning out copies for all your RVing friends. Embellishing the pillowcase front is half the fun. 18" x 18" is a small area that you can quickly fill: for example, a single quilt square in your favorite pattern, perhaps with borders added to get it to just the size you need... or if you're skilled with the needle, a piece of cross-stitch work... or a latch-hook project...the sky's the limit!
But I promised I'd explain how I did the quilted photo shown in the example pillow. The key was inkjet-printable fabric. Most fabric and craft stores, such as Michael's and Jo-Ann, carry this.
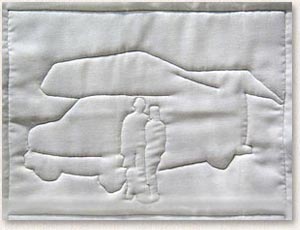
The material I bought comes glued to a thin stiffener sheet that makes it easy to feed it through your printer without worrying about jams. After printing, you peel away the stiffener, leaving just the fabric with your image on it. You could use it as is, but I machine-quilted it onto a piece of batting, tracing the basic outlines of the photo to give it an appealing three-dimensional look. Here's the back of the quilted piece, so you can see how little stitching was needed.
The quilting adds a finishing touch that really makes this a unique item... and needless to say, if you have a good picture of a friend's RV, pet, or grandchildren to work with, this makes a very personal and very much appreciated gift!
(How does this work?)
v2.2 "Eureka!" is © 2012 by Andy Baird.